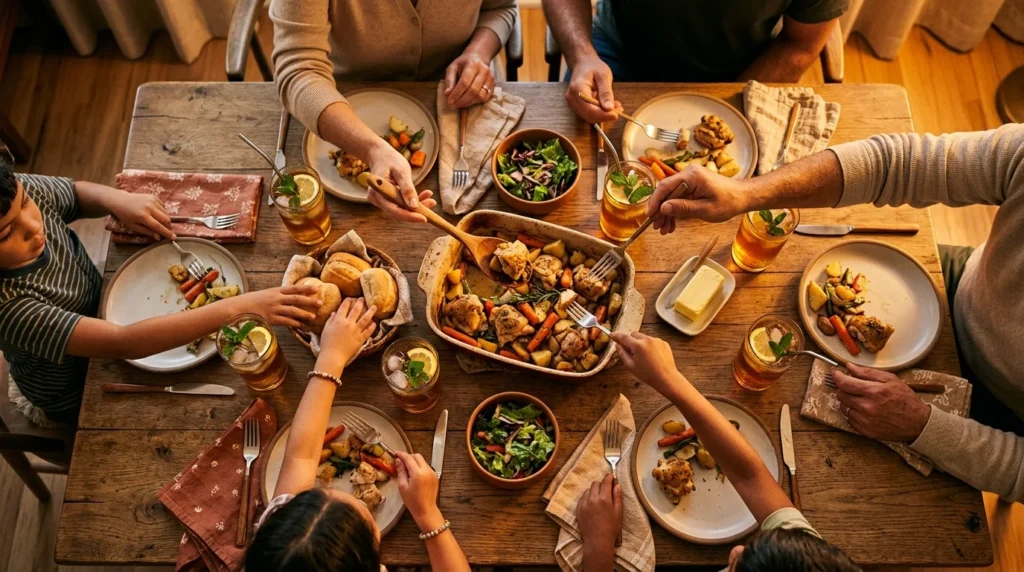
There is something inherently soul-warming about a plate of perfectly cooked chicken chunks. Whether you are feeding a group of hungry children after a long day of school or looking for the ultimate “cheat meal” that doesn’t actually feel like a compromise on quality, chicken chunks are the gold standard of comfort food. Often overshadowed by their more commercialized cousin, the chicken nugget, true homemade chicken chunks offer a level of texture, moisture, and flavor that no fast-food chain can replicate.
In this exhaustive guide, we are going to explore the art of the chicken chunk. We will delve into the science of the brine, the geometry of the cut, the chemistry of the breading, and the precision of the cook. This isn’t just a recipe; it’s a masterclass in creating a cozy family meal that will have everyone reaching for seconds.
Regenerate Image
WebP
1. Ingredients
To achieve the perfect balance of a crunchy exterior and a juicy interior, the quality and selection of ingredients are paramount. Below is the detailed breakdown of everything you will need to create this masterpiece.
The Core Components
| Ingredient | Quantity | Specification | Role |
|---|---|---|---|
| Chicken Breast | 2 lbs (1kg) | Boneless, skinless, organic preferred | The primary protein and star of the dish. |
| Buttermilk | 1.5 Cups | Full fat | Acts as a tenderizer and an adhesive for the flour. |
| All-Purpose Flour | 2 Cups | Sifted | The base of the crispy coating. |
| Cornstarch | 1/2 Cup | Pure powder | Provides the “shatter-crisp” texture. |
| Eggs | 2 Large | Room temperature | Ensures the breading sticks firmly to the meat. |
| Smoked Paprika | 1 Tablespoon | Spanish or Hungarian | Adds a deep, earthy color and subtle smokiness. |
| Garlic Powder | 2 Teaspoons | Granulated | Provides a savory, aromatic backbone. |
| Onion Powder | 1 Teaspoon | White onion variety | Enhances the natural sweetness of the chicken. |
| Cayenne Pepper | 1/2 Teaspoon | Optional (to taste) | Adds a gentle heat that wakes up the palate. |
| Sea Salt | 2 Teaspoons | Fine grain | Essential for flavor enhancement and moisture retention. |
| Black Pepper | 1 Teaspoon | Freshly cracked | Adds a sharp, pungent bite. |
| Vegetable Oil | 1 Quart | High smoke point (Canola or Peanut) | The medium for achieving that golden fry. |
Regenerate Image
WebP
2. Selection
Choosing the right chicken is the first step toward success. While some prefer chicken thighs for their higher fat content and inherent juiciness, the classic chicken chunk is best made with chicken breast. Why? Because the breast provides a clean, consistent texture that pairs perfectly with a heavy breading.
When shopping, look for “air-chilled” chicken. Most commercial chicken is chilled in a water bath, which means the meat absorbs excess water. When you fry water-logged chicken, that moisture escapes as steam, often pushing the breading away from the meat and resulting in a soggy crust. Air-chilled chicken retains its natural juices, ensuring the meat stays tender while the crust stays attached and crispy.
Regenerate Image
WebP
3. Preparation
The secret to a great family meal is the preparation. You want the chicken chunks to be uniform in size. If one piece is three times larger than another, the smaller one will dry out before the larger one is cooked through. Aim for 1-inch squares. This size is large enough to remain juicy but small enough to cook quickly and provide a high surface-area-to-volume ratio for maximum crunch.
Before you even touch the flour, consider a “dry brine.” Salting the chicken chunks 30 minutes before you start the breading process allows the salt to penetrate deep into the muscle fibers, seasoning the meat from the inside out and helping it retain moisture during the high-heat cooking process.
Regenerate Image
WebP
4. Brining
The buttermilk soak is not a step to be skipped. Buttermilk is slightly acidic; this acidity gently breaks down the protein structures in the chicken, making it incredibly tender. Furthermore, the thick consistency of buttermilk creates a perfect “glue” for the flour mixture.
For the best results, let the chicken chunks marinate in the buttermilk for at least one hour, or up to four hours in the refrigerator. If you don’t have buttermilk on hand, you can make a quick substitute by adding a tablespoon of lemon juice or white vinegar to a cup of whole milk and letting it sit for five minutes.
Regenerate Image
WebP
5. Coating
The coating is where the magic happens. We use a combination of all-purpose flour and cornstarch. While flour provides the bulk and flavor, cornstarch prevents the development of gluten, which can make a crust tough or bready. The result of this mix is a light, airy, and incredibly crunchy shell.
When seasoning your flour, be generous. A common mistake is under-seasoning the breading. Remember, this is the only part of the dish that carries the aromatics like paprika and garlic. Whisk the dry ingredients thoroughly to ensure every bite has an even distribution of flavor.
Regenerate Image
WebP
6. Dredging
To get those craggy, “extra-crispy” bits that everyone loves, use the “wet-hand, dry-hand” method. Lift the chicken from the buttermilk with your left hand (wet) and drop it into the flour mixture. Use your right hand (dry) to toss and press the flour onto the meat.
Pro-tip: Drizzle a couple of tablespoons of the buttermilk soak into your flour mixture and stir it with a fork before dredging. This creates small clumps of dough in the flour that will stick to the chicken and fry up into ultra-crunchy nuggets of joy.
Regenerate Image
WebP
7. Frying
Temperature control is the difference between a greasy mess and a golden masterpiece. You want your oil to be between 350°F and 360°F (175°C – 182°C). If the oil is too cold, the breading will absorb the fat and become heavy. If it’s too hot, the outside will burn before the inside is safe to eat.
Use a heavy-bottomed pot or a cast-iron skillet, which retains heat better than thin aluminum. Fry in batches—do not overcrowd the pan! If you put too much chicken in at once, the temperature of the oil will drop rapidly, and you’ll lose that initial “sear” that seals the juices in.
Regenerate Image
WebP
8. Resting
Once the chicken chunks are a deep golden brown, remove them with a slotted spoon or a spider strainer. Do not place them directly onto paper towels. While paper towels absorb oil, they also trap steam, which will turn your crispy bottom-layer soggy in seconds.
Instead, place the fried chunks on a wire cooling rack set over a baking sheet. This allows air to circulate around the entire piece of chicken, keeping it crisp on all sides. Sprinkle with a tiny bit more salt immediately after they come out of the fryer while the surface oil is still wet.
Regenerate Image
WebP
9. Science
Understanding the “Maillard Reaction” is key to great cooking. This is a chemical reaction between amino acids and reducing sugars that gives browned food its distinctive flavor. When you fry chicken, you aren’t just cooking it; you are creating hundreds of different flavor compounds that don’t exist in raw or boiled meat.
The cornstarch we added earlier also plays a role in “moisture migration.” It forms a barrier that slows down the escape of steam from the meat, keeping the inside juicy while the outside becomes a hard, protective shell. This is the science of the perfect bite.
Regenerate Image
WebP
10. Variations
Once you have mastered the basic recipe, you can begin to experiment with different flavor profiles to suit your family’s tastes.
- The Southern Classic: Add a dash of hot sauce to the buttermilk and increase the black pepper in the flour.
- The Asian Fusion: Replace the buttermilk with a mixture of soy sauce and ginger, and use Panko breadcrumbs for the final coating.
- The Herb Crust: Add dried oregano, thyme, and basil to the flour for a Mediterranean twist.
- The Spicy Kick: Double the cayenne and add a teaspoon of chili flakes to the breading.
Regenerate Image
WebP
11. Baking
If you are looking for a healthier alternative to deep-frying, baking is a viable option, though the texture will be slightly different. To get a good crunch in the oven, you must “pre-toast” your breadcrumbs or flour.
Spread your flour or breadcrumbs on a baking sheet and bake for 5 minutes until lightly golden before dredging the chicken. Use a high temperature (425°F/220°C) and place the chunks on a wire rack inside the oven to ensure even heat distribution. Spray the chunks lightly with oil before they go in to help the browning process.
Regenerate Image
WebP
12. Air-Frying
The air fryer has revolutionized the homemade chicken chunk. It provides the convection power to mimic a deep fry with only a fraction of the oil. To air-fry these chunks, set the machine to 400°F (200°C).
Arrange the chunks in a single layer, ensuring they aren’t touching. Lightly spritz them with an oil mister. Cook for 10-12 minutes, shaking the basket halfway through. The result is a remarkably crispy chunk that feels light and clean on the palate.
Regenerate Image
WebP
13. Sauces
A chicken chunk is only as good as the sauce you dip it in. While store-bought is fine, a homemade sauce elevates the meal to restaurant-quality status.
- Honey Mustard: Mix equal parts Dijon mustard, yellow mustard, and honey. Add a splash of apple cider vinegar for tang.
- Spicy Ranch: Fold some Sriracha or buffalo sauce into a high-quality buttermilk ranch dressing.
- Garlic Aioli: Whisk together mayonnaise, minced garlic, lemon juice, and a pinch of salt.
- BBQ Balsamic: Mix your favorite BBQ sauce with a reduction of balsamic vinegar for a sophisticated, smoky-sweet dip.
Regenerate Image
WebP
14. Sides
To make this a complete, cozy family meal, pair your chicken chunks with sides that complement the crunch.
Classic choices include creamy coleslaw, which provides a cold, acidic contrast to the hot, fried chicken. Mashed potatoes with a simple white gravy can turn the meal into a “meat and three” Southern staple. For something lighter, a crisp garden salad with a lemon vinaigrette helps cut through the richness of the fried coating. Don’t forget the pickles! Cold, briny pickles are the traditional accompaniment to fried chicken for a reason.
Regenerate Image
WebP
15. Kids
If you are cooking specifically for children, you can modify the recipe to be even more “kid-friendly.” Reduce the spices that provide heat (like cayenne) and perhaps cut the chicken into even smaller “popcorn” sizes.
Involving kids in the process—like letting them help shake the chicken in a bag of flour—can make the meal even more special. It teaches them about the textures of food and makes them more likely to enjoy the meal they helped create.
Regenerate Image
WebP
16. Health
While fried chicken isn’t usually categorized as “health food,” making it at home is infinitely better for you than buying it processed. By using high-quality oils like avocado or peanut oil, you avoid the trans fats found in many commercial deep fryers.
Furthermore, by controlling the salt and using organic, hormone-free chicken, you are providing your family with a high-protein meal that is free from preservatives and artificial fillers. You can also increase the nutritional profile by serving it alongside steamed broccoli or roasted sweet potatoes.
Regenerate Image
WebP
17. Storage
If you happen to have leftovers—which is rare!—proper storage is key. Let the chicken cool completely to room temperature before putting it in an airtight container. If you seal it while it’s still warm, the steam will condense and make the breading soggy.
Chicken chunks will stay fresh in the refrigerator for up to three days. For longer storage, you can freeze them. Lay the cooked chunks out on a baking sheet to freeze individually before transferring them to a freezer bag; this prevents them from sticking together in one big clump.
Regenerate Image
WebP
18. Reheating
Never use a microwave to reheat chicken chunks unless you enjoy rubbery meat and mushy breading. The best way to regain that original crunch is in the oven or air fryer.
Preheat your oven to 375°F (190°C) and place the chunks on a wire rack for 8-10 minutes. In an air fryer, 3-5 minutes at 370°F will do the trick. The high heat will re-crisp the outer oils without drying out the interior meat, making them taste almost as good as they did the moment they left the fryer.
Regenerate Image
WebP
19. Troubleshooting
Is your breading falling off? That usually means the chicken was too wet when it hit the flour, or you didn’t let the breaded chicken “set” for a few minutes before frying. Letting the breaded chunks rest for 5-10 minutes allows the moisture to hydrate the flour, creating a stronger bond.
Is the chicken dry? You likely overcooked it. Use a meat thermometer to pull the chicken when it hits an internal temperature of 160°F (71°C). The “carryover cooking” will bring it up to the safe 165°F (74°C) mark while it rests, ensuring it stays juicy.
Regenerate Image
WebP
20. Conclusion
Creating the perfect chicken chunk is an act of love. It requires patience, a bit of science, and the willingness to get your hands a little messy in the flour. But when you sit down at the table and see your family enjoying a meal that is light-years better than anything they could get in a drive-thru, the effort becomes worth it.
This recipe is more than just instructions; it’s a template for home-cooked success. By focusing on quality ingredients, proper technique, and the right equipment, you turn a simple piece of poultry into a culinary highlight. So, clear the counter, heat up the oil, and get ready to serve the best chicken chunks your family has ever tasted.